When driving, do you find the brakes seem to be grabbing, making grinding noises, or fighting you? You might have a stuck brake rotor, which can be a dangerous problem if not taken care of promptly. In this article, we will explain what it means if your rotor is not spinning freely, and how to fix it in a variety of ways. Let’s begin!
If your rotor is not spinning freely, it probably has too much rust around it. Try applying a cleaning solution or lubricating fluid to loosen it. You can also use a small hammer to tap around the edges of the rotor until it frees up. If that doesn’t work, you may need to remove the rotor and replace it entirely.
In this article, we’ll explore the possibilities for fixing a stuck brake rotor, whether it’s a quick cleaning, or putting in an entirely new rotor.
What Does It Mean When the Rotor Is Not Spinning Freely?
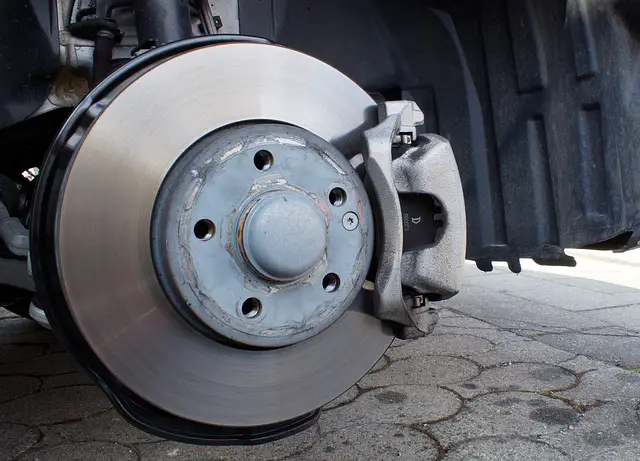
A rotor that’s not spinning freely is a problem. It can damage your tires, your brakes, and your alignment. It can also hinder your driving.
At best, you’ll deal with grinding noises and grabbing brakes. At worst, it could cause your brakes to fail at a critical time, or otherwise cause more damage to your vehicle.
Because of that, the first thing to do is get your car parked somewhere safe where you can get the tire off to see why your rotor isn’t spinning freely.
What Should I Do To Fix The Rotor?
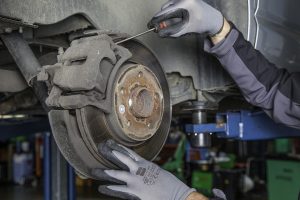
There are a number of things you can do. You can start by taking steps to clean your rotor and see if that solves the problem.
These steps include:
- Apply a cleaning solution
- Apply penetrating lubricant and/or brake fluid
- Tap gently with a small hammer or other tool
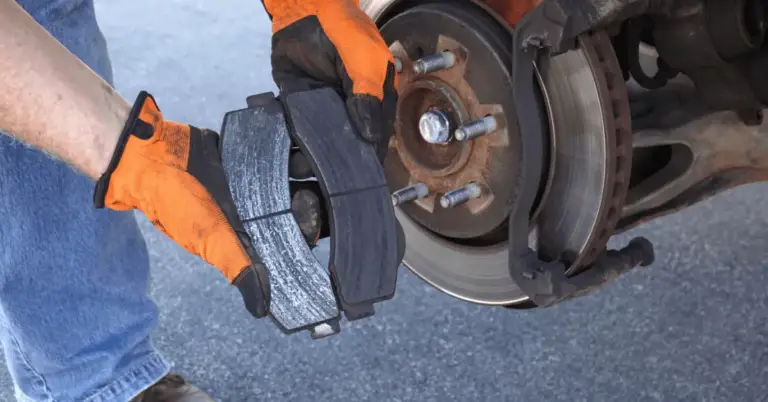
If that doesn’t work, you might need to remove the rotor and replace it. Steps for that include:
- Use a rotor pull
- Apply heat
- Use a breaker bar to pull it free
- Use an angle grinder or other tool to cut it free
Cleaning the Rotor
It’s possible the rotor is stuck because it’s partially rusted or some grime from the road has coated it to the point that it can’t rotate freely. If that’s the case, a little bit of cleaning and oiling may be all the rotor needs to get back to proper working order.
Once the wheel is off, you can try the methods listed below to see if the rotor will come free.
NOTE: If the problem is a gummed up rotor then it may be due to improper brake fluid or lubricant, so it’s a good idea to double check the brake fluid and the delivery system for it, in order to make sure everything is in proper working order.
1. Apply Cleaning Solution
There are professionally made cleaning solutions that can be applied, but there’s also the homemade solution: a mix of white vinegar and water.
Mix up the vinegar and water and spray onto the rotor. Allow the vinegar to work for at least 15 minutes. Then wipe the rotor clean and see if it rotates.
For really grimy rotors, you may want to let it sit longer, or apply it more than once.
2. Apply Penetrating Lubricant
Sometimes, the problem is an incorrect type of brake fluid or a bit of gunk that causes friction. And a little bit of lubricant may be all you need.
You can use regular WD40, but penetrating lubricant is a better option. WD40 makes a special penetrating lubricant, but you can also use another option like Liquid Wrench.
If the problem is rust, then it might work better to use a specialty lubricant like Blaster PB Penetrating Catalyst.
3. Tap Gently with a Hammer or Mallet
Sometimes, with a rusty or heavily stuck rotor, cleaning solutions and lubricant aren’t enough. It may take a bit of manual manipulation to get the rotor free.
Take a small hammer or mallet and tap gently near the edges of the rotor. You want to be careful not to damage the components, so don’t hit too hard.
It’s recommended to tap around the lug nuts and the edges of the rotor to try and loosen the plate. The goal is to cause vibrations that can loosen rust or other adherents.
Note: Any tool will work for this, but a small hammer or mallet will work best to minimize the danger of warping the rotor or damaging parts of the car.
What If Cleaning The Rotor Doesn’t Work?
If you’ve tried all of the above methods for freeing the rotor through cleaning, and it’s still not rotating the way it should, then it’s time to remove the rotor from the wheel to check it for damage. It’s also far more likely that you’ll need to replace it, as it’s likely to be too worn, rusty, or damaged to be salvageable.
4 Options for Removing and Replacing The Rotor:
Before you can check for damage, you’ll probably need to remove the rotor. And if it’s stuck tightly enough that you can’t get it free with lubricant or tapping, then you’ll need to use some stronger measures, and heavier tools.
1. Use a Rotor Pull
The easiest way to pull the rotor plate should be a rotor puller.
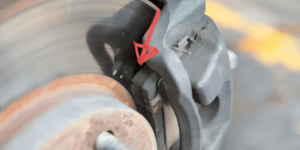
Fasten the arms of the rotor puller on either side of the plate, and secure the central screw on the central lug nut. Once that’s done, begin spinning the rotor puller and using it to loosen and free the rotor.
Once you pull the rotor free, you can remove the rotor puller along with the rotor itself, and check the plate for damage or warping.
2. Remove the Rotor Using Heat

If you’re having trouble removing the rotor with a rotor puller, or if you don’t have a rotor puller handy, then you can try to remove the rotor via heat.
A propane or oxy acetylene torch can be used to heat up the rotor plate and loosen it up. However, this is likely to warp the rotor plate and make it unusable.
If you choose to use heat to remove the rotor plate, be careful not to warp or damage any of the other components, such as the brake pads, calipers, or wheel components.
3. Use a Breaker Bar
Another option, if the rotor puller doesn’t work for you, is to use a breaker bar. You can use breaker bars to release stubborn nuts, or to remove a heavily rusted or warped rotor.
Using a breaker bar for removing the rotor is likely to permanently damage the rotor plate. Unless you’re careful, you may also damage the lug nuts or other parts of the wheel while trying to do this.
If the rotor is stuck to the point that you need a breaker bar to free it, then it may be best to enlist the services of a licensed mechanic, for your own safety.
4. Cut the Rotor Pad Free
If nothing else works, you can cut the rotor pad free with a grinder or another tool. This is absolutely the method of last resort, as you’ll definitely have to replace the rotor pad afterward.
If you have to cut the rotor pad free, then you probably want to do the following:
- Enlist the services of a licensed mechanic
- Check other components for damage
- Repair or replace any other questionable parts on the brakes or the wheel.
If the rotor is so badly rusted, gummed up or warped that it has to be cut free, then there’s likely to be other damage or issues with the wheel, which you’ll want to correct as soon as possible.
Frequently Asked Questions:
Can I Drive with a Stuck Rotor?
You can probably drive for a little while, but it’s very unsafe to do so. Stuck rotors affect the braking and can damage the wheel, making it hard to start, get up to speed, or stop. Once you’ve started noticing the signs of potential brake problems, you’ll want to look into it within two or three weeks, at the most.
Are There Other Issues That May Resemble A Stuck Rotor?
If you get shaking and difficulties with driving during acceleration, then it might be an issue with the tire or the wheel alignment. It can also be an issue with damaged brake pads or misaligned calipers. If you’re getting a lot of shaking, grabbing, or grinding, then it can potentially be any of these issues.
How Much Does It Cost To Replace A Rotor?
Replacing a rotor on your own will only cost you the price of the parts. A rotor disc usually runs in the neighborhood of $40, for just the disc. Having a mechanic do the replacement may cost you a few hundred dollars, depending on how much difficulty there is in removing the rotor.


![Can Dirty Brake Fluid Cause Squeaky Brakes? [ANSWERED] DOT-3-Brake-Fluid](https://carzaza.com/wp-content/uploads/2023/12/DOT-3-Brake-Fluid-300x161.png)

